
Measurement Taking Guide
Taking the right measurements is the first step towards a truly custom suit or coat.
This page gathers all of our recommendations to guide you step by step in taking your measurements – exclusively designed for the male silhouette
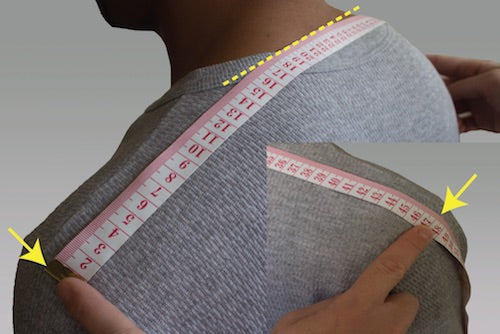
Shoulder line
Precisely locate the two shoulder bones.
- Place the measuring tape from the outer end of one to the outer end of the other, passing through the base of the neck.
- Let the tape naturally follow the curve of the back, without pulling.
- Measurement generally between 42 and 47 cm.
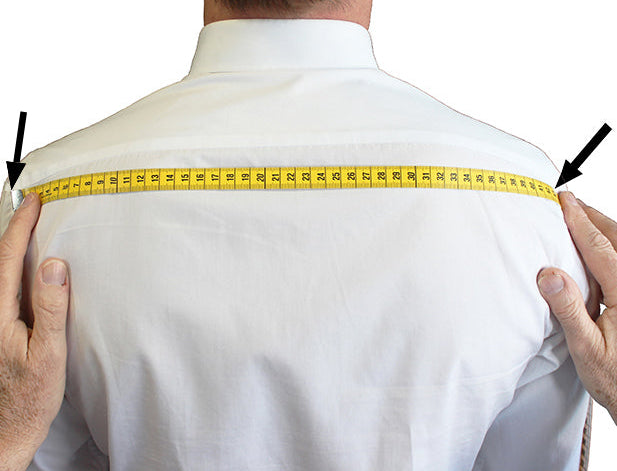
Back line
This measurement is the same for a suit or a shirt.
- Place the measuring tape between the top of the armpit and the top of the shoulder, then measure horizontally to the corresponding point on the other side (top of armpit and opposite shoulder).
- Make sure the tape remains straight to accurately reflect the width of the back.
- The value obtained corresponds generally to the shoulder line or can be at most 5 cm shorter.
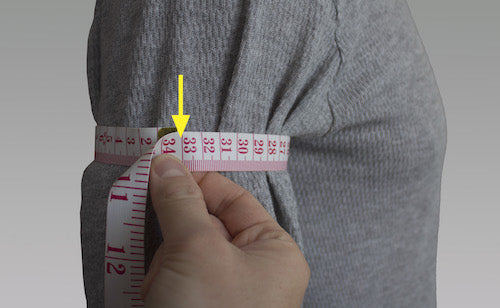
Arm tour
Wrap the measuring tape around your arm, under the armpit, at the widest point.
- Make sure to measure directly the arm and not the fabric, if the measurement is taken over clothing.
- Add the equivalent of two fingers of ease between the tape and the arm to ensure comfort and accuracy, as illustrated in the photo.
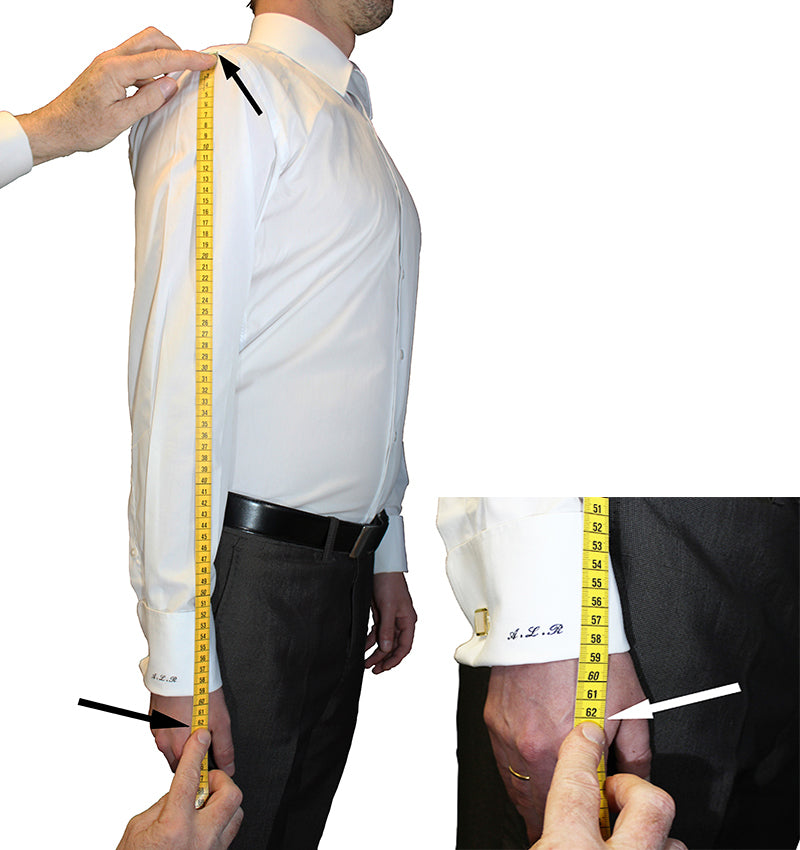
Arm length
This measurement is the same for a suit or a shirt.
- Stand up straight, with your arms at your sides.
- Place the measuring tape at the tip of the shoulder and measure down to the base of the thumb (marker indicated by the white arrow).
- To ensure the accuracy of the measurement, compare the value obtained with the sleeve length of a shirt that fits you well or that you wear regularly. This check significantly reduces the risk of error.
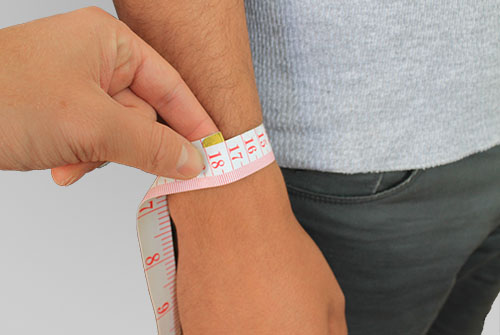
Wrist tour
Wrap the measuring tape around the wrist, at the height of the bone.
- The tape should be fitted but not tight.
- Add the equivalent of two fingers of ease (as shown in the photo).
- If you wear a watch daily, take the measurement directly with it, but in this case, do not add two fingers of ease: simply add 1 cm.
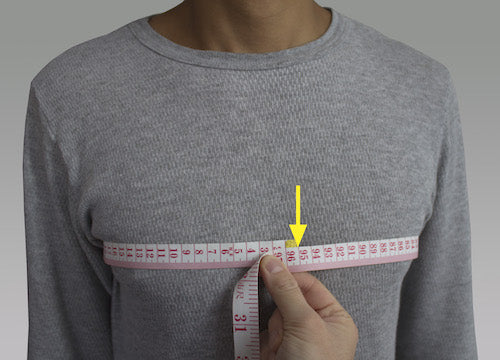
Chest measurement
Wrap the measuring tape around your chest, at the widest point (usually the tip of the chest)
- Stand in a natural posture, with relaxed shoulders.
- The tape should be fitted but not tight.
- Add the equivalent of two fingers of ease between the tape and your body to ensure comfort and accuracy.
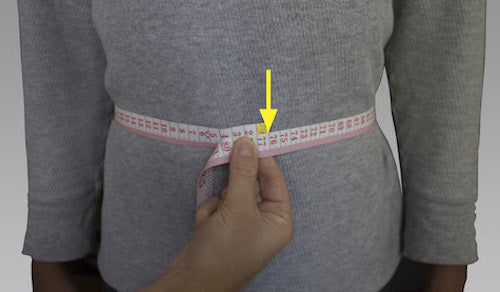
Abdominal tour
Wrap the measuring tape around the bust. at the level of the navel.
- Make sure the tape remains taut and well horizontal all around.
- The tape should be fitted but not tight.
- Slide the equivalent of two fingers of ease between the tape and the body to ensure comfort and accuracy of the measurement.
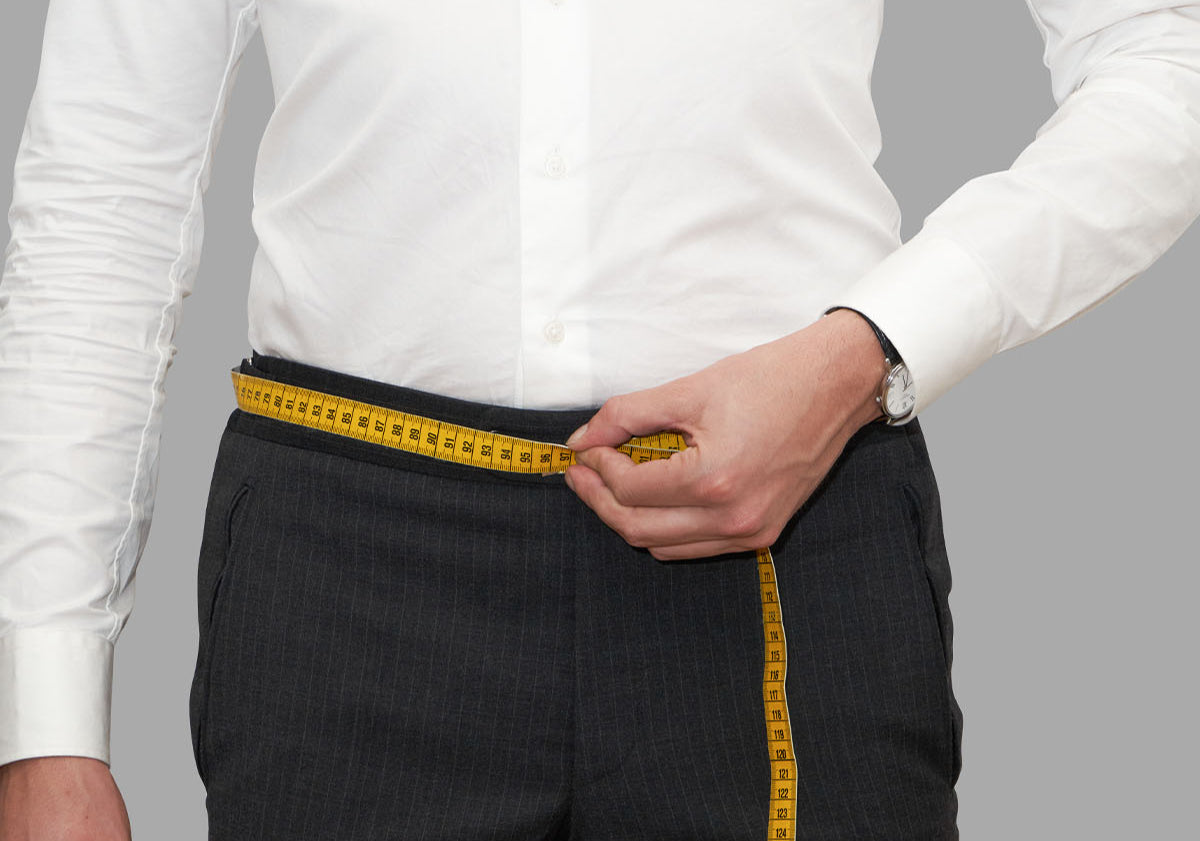
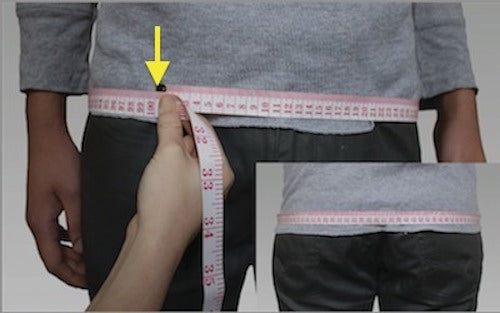
Belt Tour
Wrap the measuring tape around the waist, at the exact place where the pants will be worn.
- Take the measurement ideally directly on the skin, in order to obtain the greatest accuracy.
- Do not add ease: the measurement must be exact to ensure pants that fit perfectly, without excess width.
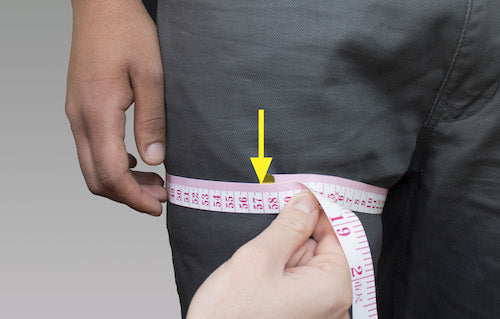
Hip tour
Wrap the measuring tape around your buttocks, at the widest point.
- Make sure to keep the tape well horizontal all around.
- Add the equivalent of two fingers of ease between the tape and the body to ensure comfort and accuracy.
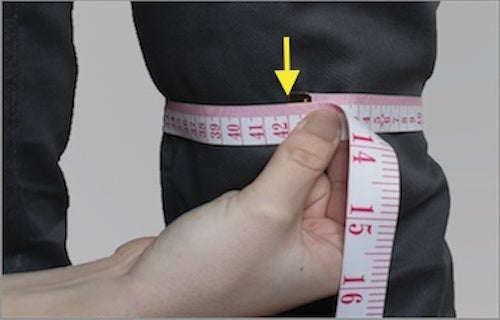
Thigh Tour
Wrap the measuring tape around the thigh, at the level of the inseam to obtain an accurate measurement.
- Add the equivalent of two fingers of ease between the tape and the thigh to ensure comfort and accuracy.
Knee Tour
Wrap the measuring tape around the leg, just above the knee.
- Make sure the tape remains perfectly horizontal all around.
- Add the equivalent of two fingers of ease between the tape and the leg to ensure comfort and accuracy.
Calf Tour
Wrap the measuring tape around your calf, at the widest point
- Make sure the tape remains perfectly horizontal all around.
- Add the equivalent of two fingers of ease between the tape and the leg to ensure comfort and accuracy.
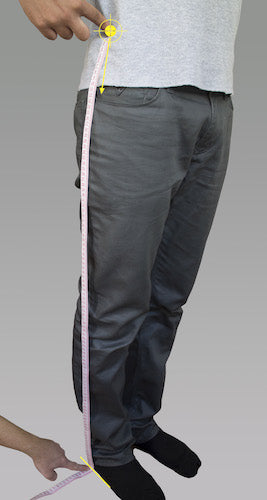
Leg length
Stand sideways and place the tape measure from the waist to the floor.
- Keep the tape taut and straight throughout the measurement.
- Take the measurement without shoes, in order to obtain the exact length of the leg.
Fork
Measure with the tape measure from the front of the waistband to the back, passing through the crotch.
- If the waist measurement was taken at high waist, redo the measurement by positioning the tape at the exact place where the pants will be worn.
- If you ride a bike or regularly take the car, add 1 to 2 cm to ensure comfort and ease in a seated position.
Jacket Length
Place the measuring tape at the highest point of the shoulder (marker illustrated in the photo on the left), at the base of the neck.
- Measure vertically, in a straight line, to the level where the jacket should fall.
- The ideal length of the jacket is reached when it covers the bottom of the buttocks.
- To obtain the shirt length, subtract 4 cm from the jacket measurement.
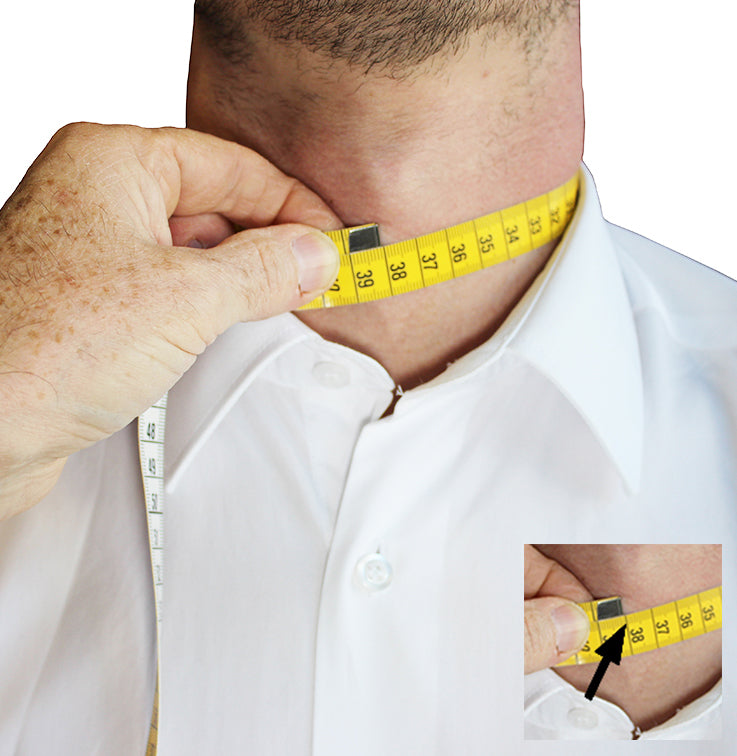
Necklace
Wrap the measuring tape around your neck, at the point where the button of your shirt is usually located.
- The tape should pass under the Adam's apple.
- Slide the equivalent of two fingers of ease between the tape and the neck to ensure comfort and accuracy.